 Here is the Mojo Monday challenge sketch for this week. First, I stamped the lily pad and then masked it before stamping the cattails. I then colored them with Copic markers and cut into four even squares. The waving frog was also colored with Copics and cut out to be 3-D over the background. All stamps are from the newest Stamp Shoppe Creations line. I used the rays Tim Holtz texture fades folder on the Bo bunny dots paper. Then I stamped sentiment from Endless Creations and cut out with the nestabilites. Finally I stamped the dragonfly, which was colored with Copics and glittered over the whole thing. I glued the bug over the sentiment and used the splashes instead of ribbon or paper, to follow all pieces of the sketch. Have a great week!!
Tuesday, July 13, 2010
Having flies...
Here is the Mojo Monday challenge sketch for this week. First, I stamped the lily pad and then masked it before stamping the cattails. I then colored them with Copic markers and cut into four even squares. The waving frog was also colored with Copics and cut out to be 3-D over the background. All stamps are from the newest Stamp Shoppe Creations line. I used the rays Tim Holtz texture fades folder on the Bo bunny dots paper. Then I stamped sentiment from Endless Creations and cut out with the nestabilites. Finally I stamped the dragonfly, which was colored with Copics and glittered over the whole thing. I glued the bug over the sentiment and used the splashes instead of ribbon or paper, to follow all pieces of the sketch. Have a great week!!Monday, July 12, 2010
Chalk It Up

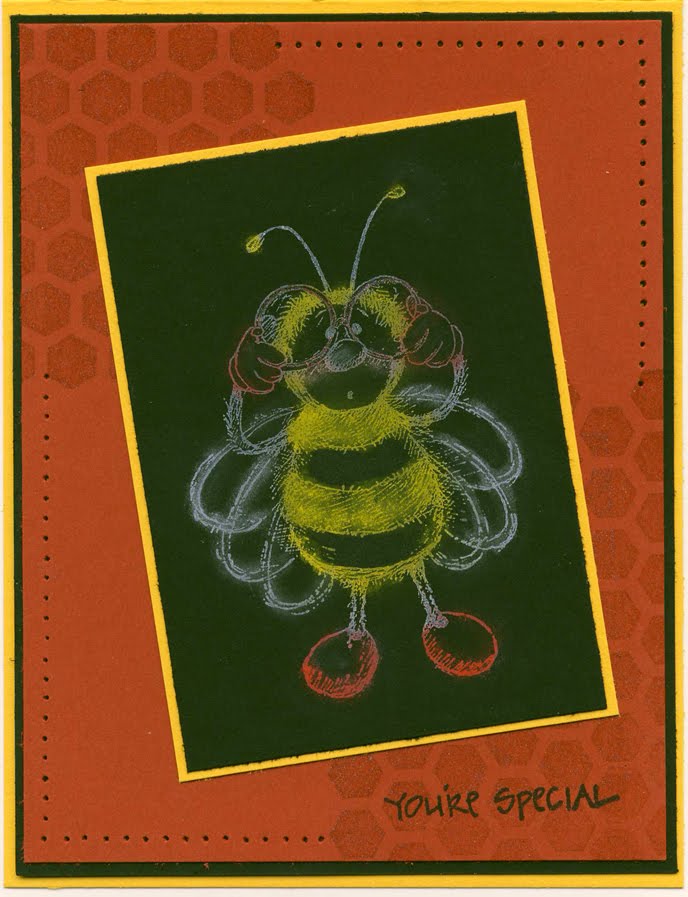
 Greetings Friends! After a bit of a hiatus, I'll be back at it this week teaching at the Shoppe!
Won't you join me for a class featuring Chalks? You know, those great little coloring tools that are stuffed waaaayyy back in your drawer?
I'll be featuring the following techniques: Background Burst, Chalkboard and Pulled Pastels.
Class starts at 6pm, Thursday, July 15th! See you then!
Sunday, July 11, 2010
Here's the scoop!
 Yesterday, I had my cream paper all embossed with the Tim Holtz Notebook embossing folder, distressed with Old paper Distress ink and punched with the EK Success binding edge punch. Then it sat there on the table and I didn't know what to do with it. Today when I saw the Sketch Saturday challenge sketch...I had an idea. I stamped the bear with ice cream from Whippersnapper and colored him with Copics. I then cut him out with the label from Nestabilities. Using the new Victorian Velvet distress ink, I sponged it over the labels die. I used the notebook paper I created yesterday as the matting fot the image. The sentiment was cut out of the fancy labels die and sponged over with the Vintage Photo ink. It all seemed to fall into place this morning. So...if there are pieces laying around that you want to use, but aren't sure what to do with them. Sleep on it and maybe tomorrow you have just the idea that you wanted! Have a good day!!
Saturday, July 10, 2010
It's fishing time...Dude!
 I made this card to satisfy two challenges today. The Cute Card Thursday challenge for this week was the theme "Schoold out for the summer!" and then I used the sketch from Friday Sketchers. I wanted to use one of my Stamp Shoppe Creations stamps, so I settled on the Dude. Now the next question was how to make him look like school is out?? I found my Northwoods cube that had a fishing pole and fish on it. The only problem was that the pole wasn't long enough, so I added an extra link to the pole and drew in the bobber and hook. Then I took the fish and stamped them two times. I got all the elements in the right spot by using my Stamp-a-majig. I then colored this guy with Copic Markers. I stamped the Endless Creations "Take it easy..." stamp and cut out with the large scallop oval nestabities. I wanted to use something different for the strips, so I used some red twill ribbon and then a strip of blue cardstock that I put through the Tim Holtz's Dot Matrix Texture fade folder. I will have to see what other accessories this dude should have!!
Friday, July 9, 2010
On the Edge...

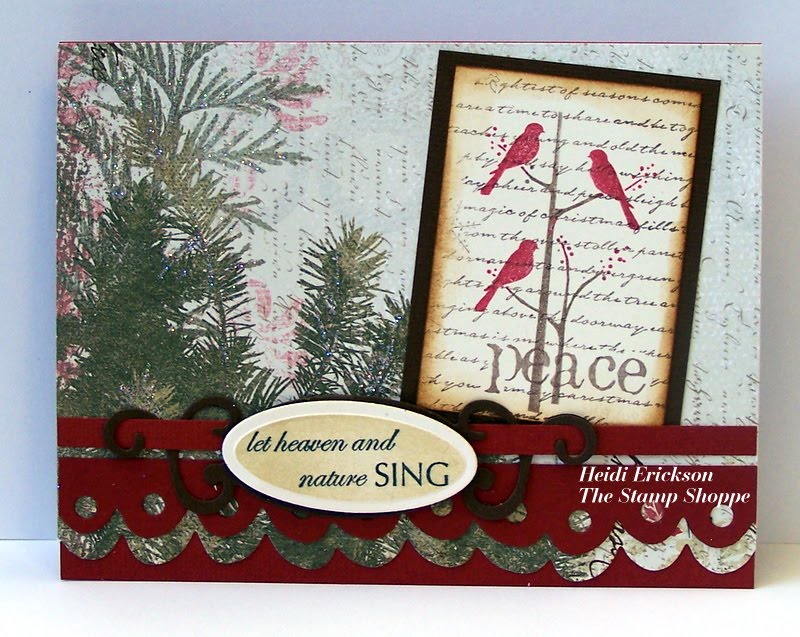 I haven't used my Tim Holtz On the Edge dies very much. In fact they have been sitting on my shelf too long, so I decided to get them out, dust them off and make some cards. I used some of the brand new Memory Box stamps and what fun I had. The top card uses the Plaque & Postage die. Using a piece of Chocolate Box Core'dinations paper, I scored the card at 2 1/8" and 4 1/4" on my ScorBuddy. I folded back the the flap and used the Plaque side of the die on that edge. I used another piece of the core'dinations paper to emboss the holly background and then sanded it to have some of the red show through. I stamped the scripted holly bird from Memory Box and then distressed the edges with Vintage Photo ink and Colored the image with Copic Markers.
The Second holiday card I made uses the Scallop On the Edge die on the Decorator paper from Memory Box. Then I cut the Scallop with dots out of Bazzill's Chili paper for a border. Then I cut another strip of Chili paper to use as a "ribbon" for the spellbinder's Fancy Tags. I stamped the Meadow Birds with Memento Dew Drop ink pads. Then over stamped with the Peace background, also from Memory Box, then distressed and layered. These were fun to use...check out how I used them in the next posting with Halloween stamps!!!
On the Edge...part 2
Here are some more cards using the Tim Holtz On the Edge dies. This time I used them with the Memory Box's new Halloween stamps...Let's take a look! This card uses the Ornate On the Edge die. I used both borders on the die. First, I cut the more elegant border out of Memory Box Blackbird paper. I cut out of the same paper a 2 1/4" strip and stamped the birds in flight on that piece. Then I use the ScorBug to faux stitch each side of the strip. Both of these pieces, I used the Vintage Photo Distress Ink to darken the edges of the orange paper. I cut out the other border on a strip of brown cardstock. On the card front, I stamped the Vintage Scroll with dark brown ink. Then I layered all the pieces on the card. I stamped the Blackbird in flight on cream cardstock, then stamped the spooky background over the top with brown ink. Distressed the edges and layered.
 This second card I did, uses the File Tabes die. I used the borders on each edge of the card. I decided to have it open just like a file folder would open. Using more of the Memory Box decorator paper, I stamped the bird on the fence on one piece and embossed the larger piece with the new Tim Holtz Collage Texture Fades folder and then sanded it. The piece seemed too "white" after I sanded it, so I rubbed some of the Vintage Photo ink over the sanded paper. Because the inside tab was showing on the outside of the card, I decorated the inside as well. You can see that below!
 There isn't a lot of samples of these On the Edge dies out online, so I hope this will help inspire you to get them out, dust them off and create, create, create!!!
 This card uses the Ornate On the Edge die. I used both borders on the die. First, I cut the more elegant border out of Memory Box Blackbird paper. I cut out of the same paper a 2 1/4" strip and stamped the birds in flight on that piece. Then I use the ScorBug to faux stitch each side of the strip. Both of these pieces, I used the Vintage Photo Distress Ink to darken the edges of the orange paper. I cut out the other border on a strip of brown cardstock. On the card front, I stamped the Vintage Scroll with dark brown ink. Then I layered all the pieces on the card. I stamped the Blackbird in flight on cream cardstock, then stamped the spooky background over the top with brown ink. Distressed the edges and layered.
 This second card I did, uses the File Tabes die. I used the borders on each edge of the card. I decided to have it open just like a file folder would open. Using more of the Memory Box decorator paper, I stamped the bird on the fence on one piece and embossed the larger piece with the new Tim Holtz Collage Texture Fades folder and then sanded it. The piece seemed too "white" after I sanded it, so I rubbed some of the Vintage Photo ink over the sanded paper. Because the inside tab was showing on the outside of the card, I decorated the inside as well. You can see that below!
 There isn't a lot of samples of these On the Edge dies out online, so I hope this will help inspire you to get them out, dust them off and create, create, create!!!
Another take on Mr. Hoppy!
 My mom stamped this Hoppy Guy. Using the Mega Oval Spellbinders to cut out the sentiment, then tucked the cattails behind it. Then she stamped the dragonflies and colored them with Copic Markers. Then overlaying the wings with crystal glitter...really makes them pop! All the stamps are Stamp Shoppe Creations stamps. Using the new "Dots" Cuttlebug folder to emboss the light yellow paper. *HINT* If you use this folder on white paper and flip it over, it makes a great golf ball paper!!! Hoppy Stamping :)
Thursday, July 8, 2010
"Hoppy" Day...
 Here is the sketch for the Midnight Madness Sketch Challenge #61. I chose to do the fancy sketch. See my take on the sketch below:
 I used the Stamp Shoppe Creation's Hoppy Frog from our just released, new images. Then I only stamped part of the "Hoppy" day sentiment on the light green tab. My cattails then were stamped and cut out to pop in front of the jumping frog. (I cut these cattails out for my good friend Michelle...I knew she would appreciate it :) Papers were from October Afternoon and the pearls are from Memory Box. I decided to used the Labels 10 from Spellbinders to fancy up the ovals. Hope you are having a "HOPPY" day!!
Wednesday, July 7, 2010
Going Bananas!
 What a crazy summer! I feel like I am going bananas!! I did a two-in-one challenge today. I started with the Mojo Monday sketch challenge and then used the "Let's get fruity!" challenge from Cute Card Thursday. The background paper is from Creative Imaginations, Monkey and branch are my Stamp Shoppe Creations stamps and the banana is from High Hopes. All images are colored with Copics. I used my new ScorBuddy from ScorPal. That cute little tools is perfect for card makers and doesn't take up much room. It also comes with it's own carrying case. There are markings every 1/4th inch and at each end there are markings every 1/8th inch. So I scored my green strip of paper at the 1/8" marks and used the scor bug to create faux stitches using the 1/8" marks as well. I used the tree boughs as one of the 3 strips from the sketch. Happy Creating!!
Subscribe to:
Posts (Atom)


